
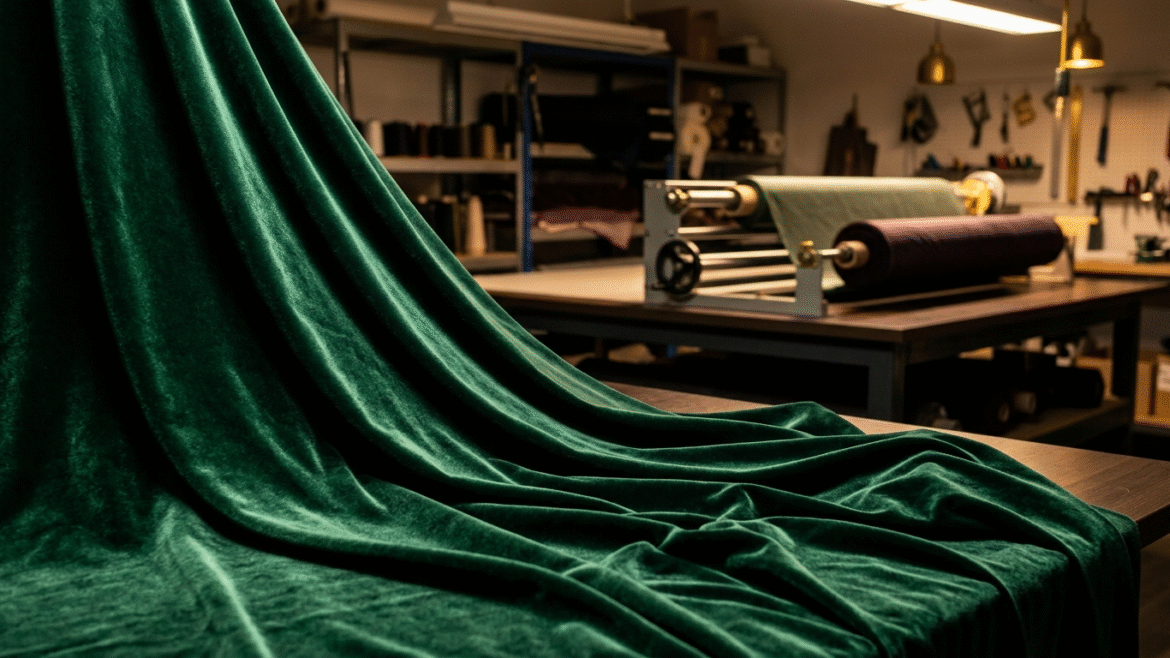
Walk into any store this December, and velvet will find you first. A plum party dress. An emerald blazer. Wide-leg trousers in deep chocolate brown. Velvet catches the light, feels like a small luxury, and makes even a simple outfit look ready for a celebration.
The runways saw it coming. Net-a-Porter’s fall/winter 2026 trend report named velvet the season’s key texture, with Alaïa, Khaite, and Ralph Lauren all showing tailored velvet looks. Meanwhile, Marie Claire spotted velvet trousers at Armani, Khaite, and Zimmermann.
For garment manufacturers, that popularity brings a real challenge. Velvet is gorgeous, but it is also one of the least forgiving fabrics on the factory floor.
So how do manufacturers handle velvet without crushing the pile? In short, they keep pressure, tension, and heat to a minimum at every stage. That means relaxing the fabric before cutting, inspecting every roll for flaws and shading, rewinding with little or no tension, and cutting every piece with the nap running the same way.
Key Takeaways
- Velvet leads the fall/winter 2026 and holiday collections, from party dresses to tailoring.
- Its pile flattens easily under pressure, heat, and moisture, and the damage can be permanent.
- The nap changes how velvet reflects light, so every piece must be cut in the same direction.
- Gentle relaxing, careful inspection, and tension-free rewinding protect velvet from roll to cut.
Why is velvet so difficult to manufacture?
Velvet gets its softness from a dense pile of tiny upright fibers. That pile gives velvet its glow. Unfortunately, it also makes the fabric fragile. According to Textile School, pressure, heat, and moisture can permanently flatten the pile. A tight roll, a heavy stack, or a careless press can leave marks that no amount of steaming will fix.
Then there’s the nap. The pile leans slightly in one direction, so the same fabric can look lighter or darker depending on how light hits it. Threads Magazine explains that velvet looks darker and absorbs light with the nap up, and looks lighter with the nap brushed down. Cut one sleeve the wrong way, and it can look as if it came from a different bolt.
Where does velvet get damaged in production?
Most problems start long before the sewing line. Here are the usual suspects:
- Tight winding. Rolls wound under heavy tension press the pile flat, especially near the core.
- Stored tension. Stretch velvet holds tension from knitting, dyeing, and winding, so cut panels can shrink later.
- Hidden flaws. Crush marks, bald spots, and shade differences are easy to miss until the garment is finished.
- Mixed nap. Pieces cut in different directions create visible color differences on the same garment.
Consequently, the best protection is a gentle, consistent process from the moment a roll arrives to the moment it reaches the cutting table.
How can factories protect velvet from roll to cut?
Relax it first. Stretch velvets need time to settle before spreading. Air-assisted relaxing machines, such as Svegea’s CRX Air, float the fabric on a cushion of air to release tension without pressing the surface.
Inspect every roll. A fabric inspection machine helps your team spot crush marks, shading, and pile defects before cutting begins, when they still cost the least to fix.
Rewind gently. When velvet needs rewinding, tension control matters. A tension-free rewinder like the W 2100S helps keep the pile upright from the outer layers right down to the core.
Cut with the nap. Mark the nap direction on the reverse side, and lay every pattern piece the same way. This layout uses more fabric, but it protects the finished look.
Finally, store rolls with care. Avoid stacking heavy rolls on top of velvet, and keep the storage area cool and dry.
Why does this matter for holiday orders?
Holiday collections run on tight deadlines. Brands want velvet dresses and blazers on the shelves by late November, and there is little time to remake rejected pieces. A crushed panel or a mismatched sleeve doesn’t just waste fabric. It can delay an entire delivery.
On the other hand, factories that handle velvet well become partners that brands trust. And when a buyer finds a supplier that delivers flawless velvet season after season, that buyer tends to come back.
Make This Velvet Season Your Best Yet
Velvet rewards patience and precision. Give it a gentle process, and it will give your customers that unmistakable glow. To find the right relaxing, inspection, or rewinding machine for your production, contact Svegea of Sweden or email Hakan Steene at h.steene@svegea.se to book a product demo.
Frequently Asked Questions
What is the nap of velvet?
The nap is the direction the pile leans. It changes how the fabric reflects light, so manufacturers cut all pieces of a garment in the same direction.
Can crushed velvet pile be restored?
Light marks may lift with gentle steam from the wrong side. However, heavy or long-term pressure can flatten the pile permanently.
Why does stretch velvet shrink after cutting?
It holds tension from knitting, dyeing, and winding. Relaxing the fabric before cutting lets it return to its natural dimensions.

A camel coat with no logo. An ivory silk shirt with no visible branding. A plain wool trouser that costs more than a month’s rent. This is quiet luxury, and it has changed what shoppers notice.
When a garment has no logo to speak for it, the fabric does all the talking. Shoppers run their hands over the cloth, hold it up to the light, and study the seams. A small slub, a faint shade band, or a pulled thread has nowhere to hide. For garment manufacturers, quality control can no longer start at the sewing line. It has to start with a fabric inspection machine, long before the first cut.
So how do garment manufacturers inspect fabric for defects? In short, operators run each roll across a lit inspection table, check it for flaws as it moves, mark every defect, and measure the roll’s true length. Most factories then grade each roll with a point system and decide whether to use it, return it, or cut around its flaws.
Key Takeaways
- Quiet-luxury garments rely on flawless fabric because there are no logos or prints to hide defects.
- Fabric inspection catches flaws before cutting, when they cost the least to fix.
- Much of the industry grades fabric with the four-point system in ASTM D5430.
- The right inspection machine depends on fabric width, speed, and where rolls go next.
Why Quiet Luxury Raises the Bar
Loud fashion has its uses. Bold prints, heavy embellishment, and large logos pull the eye away from the cloth underneath. Quiet luxury does the opposite. It strips a garment back to cut, colour, and material.
That shift puts pressure on every stage of production. A neutral coat or a pale knit shows every irregularity. Moreover, buyers of these pieces expect them to last for years, so they examine them closely before they pay. One visible flaw can turn a premium price into a return, a markdown, or a lost wholesale account.
For suppliers, the message is simple. If the brand promises perfection, the fabric must deliver it first.
The Cost of Finding Flaws Too Late
A defect costs the least while it is still on the roll. Once the fabric is spread and cut into panels, the same flaw can spoil several pieces at once. If it slips past sewing, the factory pays for labour, thread, and finishing on a garment that may never sell.
Late detection also hurts relationships. Many luxury buyers run their own checks when goods arrive. When they find defects, they may reject a whole shipment, not just the faulty pieces. As a result, a few missed flaws can delay an entire order and damage trust that took years to build.
Inspection before cutting turns unknown risks into known facts. The factory knows exactly what it has, where the flaws sit, and how much usable fabric remains.
How Garment Manufacturers Inspect Fabric for Defects
Most factories follow a similar routine:
- Load the roll onto a fabric inspection machine.
- Run the fabric over a lit inspection table at a steady, controlled speed.
- Check the full width for holes, stains, slubs, shade variation, and knitting or weaving faults.
- Mark each defect at the selvedge so cutters can avoid it.
- Record the true length and width of the roll.
- Grade the roll with an agreed point system.
The most widely used grading method is the four-point system, set out in ASTM D5430, the standard test methods for visually inspecting and grading fabrics. Inspectors give each defect one to four penalty points based on its size, then work out the total points per 100 square yards. Buyers and suppliers agree in advance how many points a roll may carry before it counts as second quality.
What Good Fabric Defect Detection Looks Like
Good fabric defect detection depends on three things: light, speed, and control.
First, the inspection area needs bright, even light, so faint shade bands and fine slubs stand out. Second, speed must suit the fabric. A plain cotton can move faster, while a fine silk or fine-gauge knit needs a slower pass. Finally, the fabric should move smoothly, without stretching or drifting to one side. Uneven tension can distort knits and hide flaws, and a wandering edge slows the operator down.
Accurate measuring matters too. Rolls do not always match the length on their labels. A reliable meter or yard counter shows what the factory really received, which protects both costing and supplier claims.
Choosing the Right Inspection Setup
Not every factory needs the same machine. Fabric width, daily volume, and the way rolls move to the next stage all shape the choice.
For standard widths, a compact roll-to-roll machine often covers daily needs. Svegea of Sweden’s CMI 180 and CMI 180E, for example, handle fabric up to 1800 mm wide at speeds of up to 45 m/min. For wider goods, the CMI 210 R and CMI 210 ZR take fabric up to 2100 mm and add photocell edge alignment, electronic tension adjustment, and an electronic meter counter. The CMI 210 ZR can also deliver fabric roll to roll or roll to flat, which helps when inspected fabric goes straight to spreading.
Whatever the model, the goal stays the same: know your fabric before you cut it. You can compare the full range on the fabric inspection machines page.
Quick Tips for Flawless Fabric
- Inspect every roll, not just samples. Premium buyers expect the same quality across the whole order.
- Slow down for delicate fabrics. Fine silks, wools, and knits reveal more flaws at lower speeds.
- Check shade from roll to roll. Compare a strip from each roll to catch colour differences between batches.
- Mark defects clearly. Use stickers or tags at the selvedge so cutters spot them at once.
- Relax knits first. Tension can stretch knitted fabric and hide its true width, so a fabric relaxing machine is a useful step before inspection.
Frequently Asked Questions
How do garment manufacturers inspect fabric for defects?
They run each roll through a fabric inspection machine, check it under bright light as it moves, mark every defect, measure the roll, and grade it, usually with the four-point system.
What is the four-point system in fabric inspection?
It is a grading method described in ASTM D5430. Inspectors give each defect one to four penalty points based on its size, then compare the total per 100 square yards with an agreed limit.
What defects does fabric inspection detect?
Common examples include holes, stains, slubs, broken yarns, shade variation, and differences in width or length.
Why is fabric inspection important for luxury brands?
Quiet-luxury garments rely on plain, premium fabric. With no logos or prints to distract the eye, even small flaws are visible, so inspection protects both the garment and the brand’s reputation.
Ready to Inspect Smarter?
Luxury starts long before a garment reaches the shop floor. It starts with the roll. To find the right fabric inspection machine for your production, contact Svegea of Sweden or email Hakan Steene at h.steene@svegea.se to book a product demo.

Every autumn, shoppers reach for sweaters, cardigans, and sweatshirts. Most of them judge a knit in seconds. They touch the fabric, check the fit, and tug at the cuff. That last move tells them more than any label.
A cuff that snaps back feels like quality. One that sags, twists, or ripples feels cheap, even when the body fabric is excellent. For knitwear manufacturers, the finishing details deserve as much attention as the yarn.
So how are rib cuffs and hems made in production? In short, factories start with tubular rib fabric and cut it into even bands on a collarette cutting machine. They then fold the bands, sew them to the sleeve or body, and finish them. The cleaner the first cut, the better the final garment looks and wears.
Key Takeaways
- Factories cut rib cuffs and hems from tubular rib fabric into bands of equal width.
- Even small differences in band width cause twisted cuffs and wavy hems.
- Uneven bands slow down sewing, raise reject rates, and waste fabric.
- The right level of cutting automation depends on volume, style changes, and staff.
Why the Cuff Makes or Breaks a Sweater
The cuff does a lot of work. It holds the sleeve in place, keeps warmth in, and frames the hand. The hem does the same job at the waist. Together, they give a sweater its shape.
Rib fabric stretches and recovers, which makes it comfortable to wear. Cutting it, however, is another story. Rib shifts under the blade, and even a small shift changes the band width. Cotton knits also relax and skew after knitting, an effect textile researchers call fabric spirality or torque. A band that is even slightly wider on one side will twist once it is sewn. Repeat that error across a winter order of thousands of sweaters, and a small flaw becomes a serious quality problem.
Moreover, today’s shoppers post reviews, and those reviews move sales. Research from Northwestern University’s Spiegel Research Center found that a product with five reviews is 270% more likely to be purchased than one with none. A single comment about a stretched-out cuff can hurt sales faster than any returns report. Brands know this, and they pass that pressure straight to their suppliers.
How Rib Cuffs and Hems Are Cut
Most knitwear factories follow the same basic process:
- Rib fabric is knitted in a continuous tube.
- An operator loads the tube onto a collarette cutter.
- The machine cuts the rotating tube into continuous bands at a set width.
- Sewing operators attach the bands to sleeves, bodies, or necklines.
The cutting step sounds simple. In practice, it decides whether the rest of the line runs smoothly or stalls.
The Hidden Cost of Uneven Bands
When bands vary in width, problems pile up quickly. Sewing operators slow down to ease uneven pieces into place. Finished cuffs pucker or roll. Quality control rejects more garments, and rework eats into already thin margins.
Hand cutting makes this worse. Scissors and rotary tools depend on the operator’s eye and energy, and both fade over a long shift. As a result, the first cuff of the day rarely matches the last.
Waste adds up too. A 2024 UC Santa Barbara study cites estimates that 10–15% of fabric is already discarded during cut-and-sew, and a study published by the U.S. National Institutes of Health puts the figure as high as 20%. Every off-width band that gets thrown away adds to that loss, and it is fabric the factory has already paid for. Over a full season, that loss can quietly erase the profit on an entire style.
Finding the Right Level of Automation
Once a factory sees these costs, the next question is how much automation it actually needs. The answer is rarely “as much as possible.”
Large plants that run the same basic tee for months often benefit from fully automatic lines. Many knitwear producers, though, work differently. They run medium volumes, change styles every few weeks, and bring in seasonal staff for the autumn rush. For them, a semi-automatic collarette cutter usually makes more sense.
With a semi-automatic setup, the machine handles the precision cutting, while the operator keeps control of loading and setup. Changeovers between band widths go faster, and the upfront investment stays lower. New operators also learn the process quickly, which matters when deadlines are tight.
Range matters as much as speed. A single machine should cover both slim cuffs on a fine merino sweater and deep hems on a heavy sweatshirt. Svegea of Sweden, which has built automatic collarette cutters for more than 70 years, offers semi-automatic models that cut bands from 16 to 140 mm and handle two bands at once as standard. That flexibility lets one cutter serve an entire autumn collection instead of a single style.
Quick Tips for Better Rib Bands This Season
- Relax the fabric first. Rib fabric fresh off the roll often holds tension, so let it settle before cutting to keep bands at their true width. Garment and textile manufacturing companies agree that relaxation is a key factor in a knit’s dimensional stability, and note that handling in the cutting room can cause further shrinkage.
- Match the band to the garment. Use narrower bands for fine-gauge knits and wider ones for heavy sweatshirts and outerwear.
- Check your knives daily. A dull blade drags rib fabric and leaves uneven edges.
- Test before you commit. Cut a short run, measure the bands, and adjust before you start the full order.
- Track your rejects. If cuff and hem defects keep rising, the cause often starts at the cutting table, not the sewing line.
Frequently Asked Questions
What is a collarette cutting machine? A collarette cutting machine cuts tubular knitted fabric into continuous bands of equal width. Factories use these bands for cuffs, hems, neckbands, and binding.
How are rib cuffs cut for sweaters? Factories cut rib cuffs from tubular rib fabric on a collarette cutter set to the required band width. Operators then fold the bands and sew them to the sleeves.
What is the difference between semi- and fully automatic collarette cutters? Semi-automatic cutters need more operator input during loading and setup, which suits medium volumes and frequent style changes. Fully automatic cutters need less manual work and suit high-volume production of the same styles.
Why do sweater cuffs twist after sewing? Twisted cuffs usually come from bands that vary in width or from fabric cut while still under tension. Relaxing the fabric and cutting with consistent equipment solves most cases.
Ready to Perfect Your Cuffs?
Sweater season rewards the details. If your team wants cleaner cuffs, steadier hems, and less waste, a short conversation can point you in the right direction. Contact Svegea of Sweden or email Hakan Steene at h.steene@svegea.se to book a product demo.
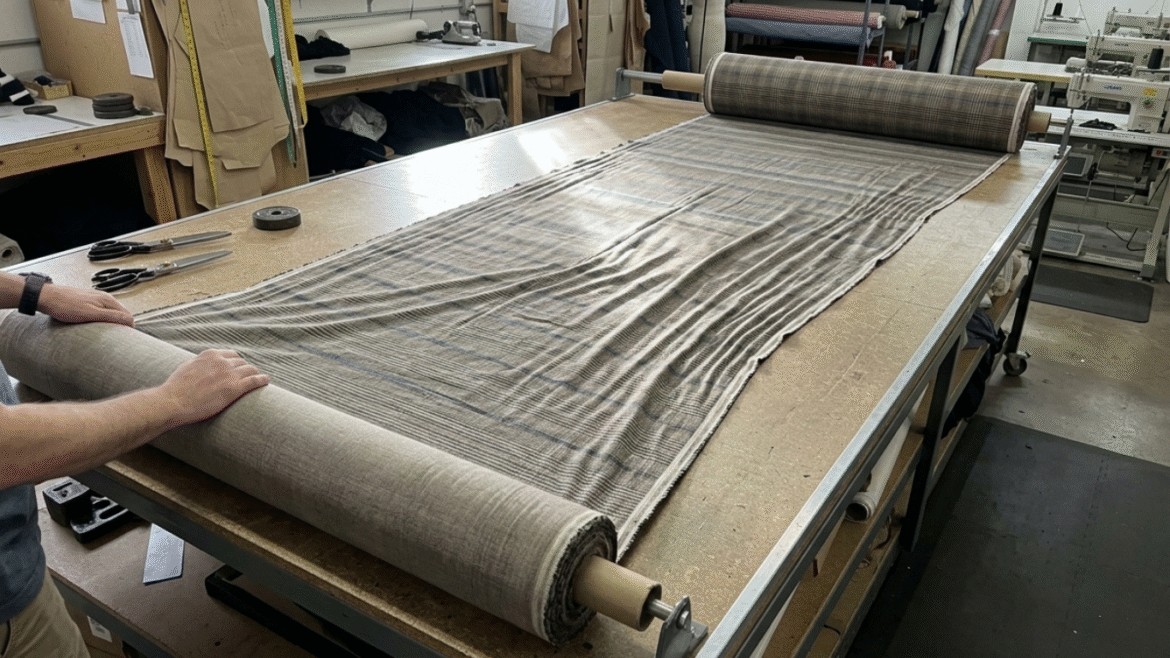
Sustainable Fabric Cutting Technology
Fabric relaxing is a pre-cutting step that lets rolled fabric rest under controlled, tension-free conditions before it reaches the cutting table. A fabric relaxing machine unwinds the roll, releases the internal stress built up during knitting, dyeing, or transport, and lets the material settle into its true dimensions. This one step cuts pattern distortion, lowers reject rates, and reduces textile waste in manufacturing. Heading into 2027, it’s one of the more practical sustainability upgrades a cutting room can make.
What causes fabric waste in cutting rooms?
Knitting, dyeing, and transport all put significant tension on rolled fabric. Winding a roll tightly, dyeing it under heat, or shipping it across the country all pull and stretch the material in ways the eye can’t see. The fabric holds this tension until something releases it. If nothing does, the release happens on the cutting table — or worse, after workers sew the garment.
Here’s the practical problem this creates. A cutter lays fabric flat and cuts it to a pattern while the material is still under tension. Once it’s off the table, the fabric relaxes and pulls back toward its natural shape. Panels that looked perfect during cutting shrink, skew, or twist. Seams no longer align. The finished garment may pucker, sag, or fit incorrectly after its first wash, and none of this shows up until it’s expensive to fix.
Knit fabrics and stretch wovens with spandex or Lycra content are especially prone to this problem, because their fibers hold tension longer than rigid wovens do. Circular knits add another layer of risk: cutting teams slit the tube open and spread it flat before cutting, and that extra handling step introduces skew on top of existing distortion.
The financial impact is larger than most cutting rooms assume. Fabric waste in cutting rooms typically runs 10% to 20% of total material, according to Lectra, and fabric alone often accounts for more than half of a garment’s total cost. Even a small improvement in fabric utilization translates directly into lower material spend and less waste headed to landfill or recycling.
How does fabric relaxing reduce waste?
A fabric relaxing machine addresses the problem at its source, before the fabric ever reaches the marker table. Instead of cutting a stressed, distorted roll and hoping for the best, the fabric first travels through a relaxing unit that unwinds it slowly, removes tension through mechanical rollers or controlled airflow, and lets the fibers settle back into their natural, balanced state.
Once the fabric relaxes, its true dimensions return, and cutters can follow the fabric’s actual grain instead of a stretched, temporary one. That single change has a ripple effect across the whole production line:
- Fewer distorted panels means fewer rejected pieces and less scrap fabric.
- Consistent dimensions mean tighter marker efficiency, so planners can nest patterns closer together without leaving a safety margin for shrinkage.
- Fewer post-wash surprises mean fewer returns and less rework, which saves fabric that would otherwise go into a second cut.
- Stable, tension-free feeding protects delicate or elastic fabrics from stretching, snagging, or fraying at the edges.
In short, fabric waste drops when cutting rooms remove tension before the fabric reaches the marker table, and manufacturers get more usable garment pieces out of every roll they buy. Operators feed a well-relaxed roll into the spreader without added stress, so what a planner sees on the marker is what the sewing line actually gets.
Which fabric relaxing machine fits my production volume?
Svegea builds fabric relaxing machines for a range of production volumes and fabric types, from standard knit-and-woven operations to high-speed, air-assisted lines handling delicate stretch textiles. The table below compares the current lineup so you can match a machine to your cutting room’s needs.
| Model | Best for | Relaxing method | Key feature | Learn more |
| CR210 | Standard-volume cutting rooms | Stepless electronic speed control with an oscillating fold system | Photocell loop control for smooth, tensionless feeding | svegea.se/product/cr210-fabric-relaxing-machine/ |
| CR210A | Higher-precision cutting rooms needing tighter edge control | Same tensionless feeding as the CR210, plus automatic edge alignment | Integrated automatic edge alignment device | svegea.se/product/cr210a-fabric-relaxing-machines/ |
| CRX Air Relaxing Series | High-speed lines and delicate stretch fabrics (jersey, lycra, technical textiles) | Dual independent air-flotation zones instead of mechanical rollers | PLC control, automatic width measurement, speeds up to 40 m/min | svegea.se/product/fabric-relaxing-machine-crx-air/ |
The CR210 suits standard-volume cutting rooms that need dependable, tensionless feeding without a large equipment footprint. The CR210A builds on that same platform and adds an automatic edge alignment device for manufacturers who need tighter tolerance control on wide or high-value fabric runs. The CRX Air Relaxing Series runs on controlled airflow instead of mechanical rollers, which makes it the better fit for lightweight knits, lycra blends, and other fabrics that stretch or curl easily under physical contact.
A quick note on model selection: Svegea’s current fabric relaxing lineup covers these three machines. If you were comparing a “CR205” model, double-check the spec sheet or brochure you’re working from — it doesn’t currently appear as an active model on svegea.se, and the closest equivalent for lighter, standard-volume applications is the CR210.
Sustainability impact
The stakes go beyond one cutting room. The fashion industry loses the equivalent of one garbage truck of textiles to landfill or incineration every second worldwide, and recyclers turn less than 1% of clothing back into new garments, according to the Ellen MacArthur Foundation. Preventing waste at the cutting stage keeps material out of that stream entirely.
Regulation is starting to reflect this. In Europe, manufacturers and retailers destroy an estimated 4% to 9% of the textile products they place on the market before anyone ever uses them, according to the European Environment Agency. That data helped shape the EU’s Ecodesign for Sustainable Products Regulation (ESPR), which bans large companies from destroying unsold textiles starting in July 2026. Manufacturers who cut waste upstream, at the cutting table, stand in a stronger position for this kind of policy shift than those relying on downstream fixes.
Fabric relaxing also supports a “cut it once” mindset. When pattern pieces hold their shape after cutting, fewer garments need rework, fewer rolls need re-ordering to cover shrinkage losses, and manufacturers waste less packaging, transport, and processing on fabric that never becomes a finished product. For a fashion industry under growing pressure to show measurable sustainability progress by 2027, this kind of upstream fix is one of the more cost-effective places to start.
Not inevitable
Cutting-room waste isn’t inevitable — it’s largely a tension problem, and tension is solvable before the fabric ever meets the blade. A fabric relaxing machine gives manufacturers a practical, proven way to stabilize material, protect pattern accuracy, and reduce textile waste in manufacturing without slowing down production.
To see the full fabric relaxing lineup, product brochures, and specifications, visit our Fabric Relaxing Series page. For more on fabric shrinkage and pre-cutting prep, read svegea.se/prevent-fabric-shrinkage/. Contact us for a product demo!
FAQ
What is fabric relaxing in textile manufacturing?
Fabric relaxing is a pre-cutting process that removes internal tension from rolled fabric so it can settle into its natural, stable dimensions before spreading and cutting.
Why does fabric shrink after cutting if it was measured correctly?
Most likely, the fabric went through cutting while still under tension from knitting, dyeing, or transport. Once it’s off the cutting table, that tension releases, and the material shrinks or shifts out of shape.
How much fabric waste can a relaxing machine actually prevent?
Results vary by fabric type and production setup, but since cutting-room waste typically runs 10% to 20% of total material (www.lectra.com), even a modest reduction in distortion-related waste can meaningfully lower material costs.
Do all fabric types need relaxing before cutting?
Knit fabrics and stretch wovens with spandex or Lycra content benefit the most, since their fibers hold tension longer. Rigid wovens still benefit, but usually need shorter relaxing cycles.
What’s the difference between fabric relaxing and pre-shrinking?
Pre-shrinking uses washing or steaming to shrink fabric before cutting, which works but takes time and adds cost. Relaxing lets the fabric settle naturally, without added moisture or heat, which is faster and gentler on delicate materials.

Autumn is creeping back in, and with it, the trench coat is coming out of storage again. Scroll through any fashion feed right now and you’ll see it: belted, oversized, thrown over a slip dress or buttoned up over a suit. It never really goes away, but every September it seems to reintroduce itself as the season’s must-have layer.
We’ve watched this coat cycle through fashion for years from our side of the industry — the manufacturing side. And here’s the thing most style articles won’t tell you: the reason a good trench coat still looks sharp after a decade of wear has almost nothing to do with the belt or the buttons everyone photographs. It’s buried inside the collar, the lapel, and the lining, in a set of narrow fabric strips most wearers never think about.
A Coat Built Like a Small Structure
Thomas Burberry patented gabardine back in 1879, engineering it specifically to be waterproof without the stiffness of rubberized rainwear. That original goal — weather resistance without bulk — is still what separates a real trench coat from a coat-shaped raincoat. But weatherproof fabric alone doesn’t explain why a well-made trench holds its collar stand or keeps its lapels from curling after years of use.
That comes down to internal reinforcement: collar stays, lapel interlining, and the strapping used for belts and epaulettes. Unlike a lightweight dress or blouse, a trench coat carries real structural weight. Heavy gabardine, dense twill, sometimes multiple bonded layers — none of it behaves the way thin fabric does under a sewing machine, and none of it forgives sloppy internal construction.
So while the outer fabric gets all the design credit, it’s these hidden strips of interlining and tape that decide whether the coat ages gracefully or starts sagging at the shoulders by its second winter.
What Those Hidden Strips Actually Do
A few things happen when a manufacturer gets this part right:
- The collar stands up crisply instead of collapsing, even on a heavy double-layered lapel.
- Belt loops and cuff straps stay straight and don’t twist over time.
- The fabric doesn’t fray internally where it’s under the most tension — shoulders, waist, collar edge.
- The coat keeps its shape wash after wash, season after season.
None of this shows up in a product photo. You notice it later, the first time you flip your collar up against a cold wind and it actually stays put.
Where Hand-Cutting Runs Out of Road
A skilled tailor working on a single bespoke coat can cut collar stays and waist strapping by hand, with shears and a steady eye. It works, at that scale.
It doesn’t work at factory scale. Once a manufacturer is producing thousands of coats a season, hand-slitting heavy rolls introduces the kind of inconsistency that ruins a production run: frayed edges from blade friction, strips that come out a millimeter or two off-width, automated sewing lines thrown out of alignment because the input material isn’t uniform. Multiply a small error by ten thousand units and it stops being small.
This is the point where most outerwear manufacturers move to dedicated slitting equipment. And it’s the part of the process we spend most of our time thinking about.
Where We Come In
At Svegea, we build roll slitting and band cutting machines designed around exactly this problem: cutting dense, heavy fabric into narrow, consistent strips without the fraying, stretching, or width drift that ruins a production batch.
A few things our machines are built to handle:
1. Consistent width across the whole roll. The strip you cut at meter one should match the strip at meter one thousand.
2. Clean edges on dense material. Automatic blade sharpening keeps friction and heat from fraying heavier fabrics like gabardine or bonded interlining.
3. Tension control that doesn’t distort the weave. Heavy woven fabric under the wrong tension stretches unevenly, and that shows up later as puckering.
We didn’t design this equipment with trench coats specifically in mind — it’s used across tailored blazers, technical rainwear, and industrial textiles too — but outerwear is where the margin for error is smallest. Dark, structured coats show every flaw in daylight.
The Part Nobody Photographs
There’s a reason this kind of detail rarely makes it into a fashion write-up. It’s not glamorous. Nobody’s Instagramming a roll of interlining tape. But it’s the difference between a coat that’s still in rotation a decade from now and one that’s in a donation bag by next spring.
If you’re on the manufacturing side and dealing with fraying, width inconsistency, or waste on heavy-fabric roll slitting, it’s worth a conversation — we’ve spent a long time solving exactly this problem. You can reach our engineering team through svegea.se, or explore the equipment lineup on the same site.
Either way, next time you flip up a trench coat collar against the wind, you’ll know what’s actually holding it there.
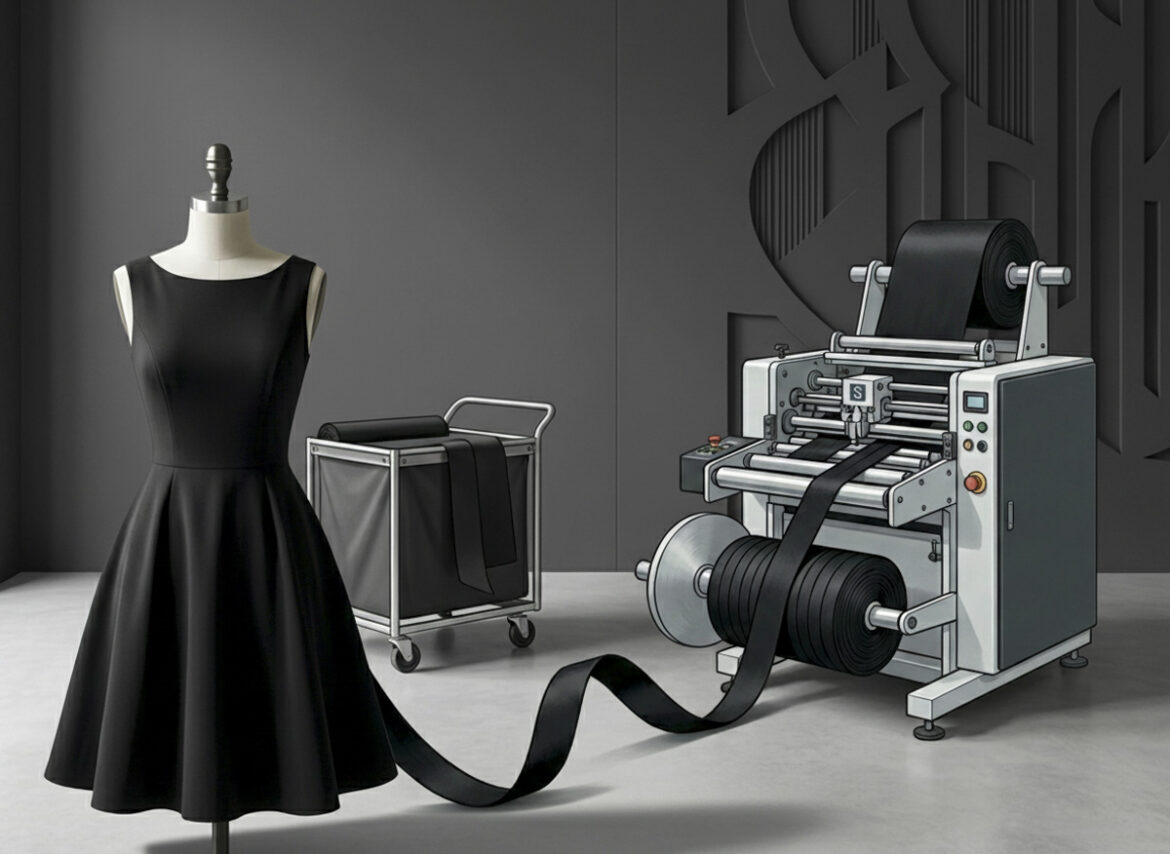
Little did Givenchy know that the little black dress he designed for Audrey Hepburn would become an essential piece in nearly every woman’s wardrobe, generations after Breakfast at Tiffany’s first hit the screen.
The Little Black Dress, or LBD, has since become fashion’s great equalizer — a single garment that flatters every shape, suits every occasion, and never goes out of style. It gets you through a chaotic morning, an unplanned dinner date, or a job interview with equal ease. Match it with a denim jacket and flats for class, add a statement necklace for a night out, or pair it with a tailored blazer to walk into an interview with confidence. Few garments do so much with so little.
But here’s what almost no one talks about when they praise the LBD’s timeless silhouette: why does a well-made black dress hold its shape, drape cleanly around the neckline, and outlast a decade of wear — while a cheaper version puckers, frays, and loses its form after a few washes?
The answer isn’t the fabric. It isn’t even the cut. It’s what happens at the edges.
The Finishing Technique You Never Notice — Until It’s Missing
Every curved seam, every clean neckline, every armhole that sits flat against the skin instead of gapping or rolling — all of it depends on a technique called bias binding.
Bias binding is a strip of fabric cut on the diagonal, or “bias,” of the material rather than along the straight grain. Cutting fabric this way gives the strip natural stretch and flexibility, which means it can wrap smoothly around curves — necklines, armholes, hems — without puckering or stretching out of shape. It’s the difference between a seam that looks handmade and one that looks engineered.
In garment manufacturing, bias binding does more than finish an edge. It:
- Reinforces stress points so seams don’t tear under movement
- Hides raw edges for a clean, professional interior finish
- Adds structure to curved lines that straight-grain fabric simply can’t follow
- Extends the garment’s lifespan, which is exactly why a well-made LBD from ten years ago can still look as sharp as the day you bought it
It’s a small detail with an outsized effect on perceived quality — the kind of thing a customer can’t always name, but instantly feels when they try on a dress that’s been finished properly.
From Sewing Room to Factory Floor
Home sewists can easily cut bias tape by hand. A simple fold, a quick press with an iron, and they’re done. But scale that up to a commercial factory. Imagine producing thousands of little black dresses every single season.
At that volume, manual cutting fails instantly. Speed drops. Fabric waste spikes. Consistency disappears completely. Manufacturers need a real engineered solution.
That’s where Svegea of Sweden enters the picture. We’ve spent decades perfecting industrial bias binding systems.
Engineers built Svegea’s Bias System specifically for garment manufacturing automation. At full production scale, it transforms massive fabric rolls into continuously sewn bias binding.
The process starts fast. First, the Tube Sewing Unit transforms open fabric into a continuous tubular piece. Next, the Bias Cutter and Winder opens and rewinds the material into an open-width roll. This prepares the fabric for precise slitting. The system handles everything smoothly, cutting delicate 6mm trims as easily as wide structural bindings for heavy fabrics.
The result? Perfect bias binding from the first meter to the ten-thousandth. No manual process can compete with that level of accuracy.
Why This Matters Beyond the LBD
Bias binding isn’t just for little black dresses. It shows up everywhere garments need clean, durable, curve-friendly finishes. You’ll find it on blouses, activewear, and children’s clothing. It even elevates non-apparel items like bags and home textiles.
Still, the classic LBD remains the ultimate quality test. Buyers expect to wear it for years. Its dark color exposes every single flaw in construction, leaving zero room for sloppy seams.
That’s what separates cheap clothing from true quality. One piece looks nice on a hanger. The other still looks pristine after fifty washes.
It all comes down to finishing. Top manufacturers rely on precision textile cutting systems to guarantee flawless results every time.
The same logic applies across the entire factory floor. Modern facilities deploy collarette cutters for waistbands and roll slitters for large fabric rolls. Precision machinery eliminates human error, keeps waste low, and guarantees consistent quality across every batch.
The Takeaway
The next time you slip into a little black dress that fits like a dream—just like the day you bought it—you’re rocking pure engineering genius. That pristine neckline and those crisp, fray-free seams surviving a decade in rotation don’t happen by accident. Every iconic silhouette relies on high-precision manufacturing, where seamless consistency turns basic threads into forever fashion.
Svegea’s Bias System and cutting machines give garment manufacturers a distinct competitive advantage through unmatched precision.
The cutting room rarely gets the credit it deserves. Dyeing, weaving, and finishing tend to dominate the sustainability conversation. Yet, the cutting stage quietly determines how much of every roll actually becomes a garment — and how much becomes trim on the floor. At Svegea, we have spent decades building the machines that sit at exactly that point in the process. Over that time, we’ve watched “zero waste” shift from a nice-to-have talking point to a real production target. This article walks through why that shift matters and what it looks like in practice.
The Hidden Cost of the Cutting Room
Textile waste is a big number, and it keeps getting bigger. According to the UN Environment Programme, the fashion industry generates roughly 92 million tonnes of textile waste every year. If nothing changes, that figure will climb past 134 million tonnes by 2030. The Ellen MacArthur Foundation puts it even more starkly: factories landfill or burn the equivalent of one garbage truck of clothing every single second.
Most of that conversation focuses on what happens after a consumer wears and discards a garment. Fair enough — that is where the largest volumes sit. But a meaningful share of textile waste never reaches a consumer at all. Factory floors generate this waste during cutting, trimming, and slitting, long before workers sew a single stitch. Offcuts, mismatched widths, and torn edges from tension problems all add up. Multiply that by thousands of meters a day, and the scrap bin becomes a genuine line item, not a rounding error.
What “Zero Waste” Actually Means on the Factory Floor
Zero waste doesn’t mean zero scrap. Realistically, some trim loss is unavoidable in any cutting process. Instead, it means designing the workflow so that you minimize waste at every step, measure it consistently, and — wherever possible — recover rather than bin it. For manufacturers, that translates into three practical questions:
- How much material do you lose to trim, misalignment, or edge damage during cutting?
- How repeatable is that loss across shifts, operators, and fabric types?
- Where can better equipment, not just better habits, close the gap?
That third question is where the technology conversation begins, and it is the one we spend most of our time thinking about.
Where Precision Cutting Technology Makes the Difference
Fabric doesn’t behave the same way twice. Tension varies by fibre, roll, humidity, and even the time of day. When a machine can’t compensate for that variability, the operator ends up compensating instead — usually by cutting a little wide “to be safe.” That habit, repeated across a full production run, is one of the most common sources of avoidable scrap in a cutting room.
Automated, electronically controlled cutting systems close this exact gap. Precise tension regulation keeps fabric feeding evenly, so the blade meets the material at a consistent width instead of a guessed one. Preset cut-width recipes remove the manual recalibration that eats into a shift’s productive time. Meanwhile, photocell edge alignment catches drift before it turns into a rejected panel. On the slitting side, PLC-controlled systems with stored cutting programs mean a changeover doesn’t require re-learning the machine from scratch. This cuts down on the “test cuts” that used to go straight into the scrap pile.
None of this is theoretical for us. It is the engineering problem we have worked on since 1952, first with collarette band-cutting machines and later across bias binding and roll-slitting equipment. Every refinement — a floating tension arm here, an automatic blade sharpener there — exists because a manufacturer somewhere told us their waste percentage was too high and asked what we could do about it.
Practical Steps Manufacturers Can Take This Quarter
Reducing cutting-room waste doesn’t require a full equipment overhaul to start. A few steps tend to produce results quickly:
1. Audit trim loss by fabric type, not just by line. Knits, wovens, and bias-cut materials behave differently, and averaging them together hides where the real losses sit.
2. Track waste as a percentage of output and review it weekly rather than quarterly. You can catch small drifts more easily — and fix them more cheaply — before they become the new normal.
3. Standardize cut-width settings across shifts so the outcome doesn’t depend on which operator runs the machine that day.
4. Service blades and tension systems on a schedule, not just when a problem shows up. A dull blade or a slack tension arm is a slow, invisible source of scrap.
5. Treat offcuts as an input, not an ending. Even if you haven’t built recycling into the workflow yet, sorting scrap by fibre type keeps that option open for later.
Individually, these steps sound modest. Together, over a year of production, they tend to move the needle more than most manufacturers expect.
Looking Ahead
The pressure on manufacturers to reduce material waste isn’t going away. If anything, tightening EU extended producer responsibility rules and growing retailer sustainability requirements are turning it into a compliance issue as much as a cost issue. Organizations like Textile Exchange continue to push the industry toward circularity. The manufacturers who get ahead of that curve, rather than reacting to it, tend to be the ones with cutting-room data already in hand.
We don’t think there’s a single fix for textile waste — it is a supply chain problem, and it needs supply chain-wide solutions. But the cutting room is one of the few places where a manufacturer has direct, immediate control over how much material becomes product versus how much becomes scrap. It is worth treating that way.
If your team is looking at cutting-room waste numbers and wondering what is realistic to improve, we are happy to talk through it. Reach out to Håkan Steene at h.steene@svegea.se for a waste-reduction consultation — no pitch, just a conversation about where the losses might be coming from.
—
Svegea of Sweden has designed and manufactured band-cutting, bias binding, and roll-slitting machinery since 1952. Learn more at svegea.se.

The Silent Language of Textiles
TL;DR: Touch is the first sense you ever develop, and fabric never stops talking to it. Long after you’ve stopped noticing color or cut, texture is still quietly running the show, calming a classroom, steadying a hospital ward, convincing a hotel guest they’ve arrived somewhere special. The science backs this up. So does the machinery that keeps a fabric’s feel consistent, batch after batch.
Touch Talks First, and It Never Really Stops
Run your hand across cashmere, then linen, then a coarse wool blanket. You don’t need a vocabulary lesson to know how each one makes you feel. Your body reacts before your brain finishes the sentence.
That’s not a coincidence. It’s a nine-month head start.
Touch is the first sense to develop in the womb, arriving around the eighth week of gestation, well before sight, hearing, or the ability to have an opinion about anything. Sensory receptors wake up first around the mouth and nose, then spread across the rest of the body over the following weeks. By the time a baby takes its first breath, touch already has months of practice logged. Fabric just keeps that conversation going.
Why Texture Beats Color to the Punch
Marketing teams love a good color story, and fair enough, color is loud and photogenic. But texture works in a quieter room: your nervous system, which reacts before your conscious mind gets a vote.
A 2024 study in PLOS ONE measured how tactile sensitivity shapes the way people rate fabric texture, confirming what mills have long suspected by feel alone: touch perception can be measured and predicted, not just guessed at.
Research published in the Spanish Journal of Marketing pushed the point further. After interviewing industry experts, the authors found that of the four qualities people notice by touch- texture, weight, temperature, and hardness- texture dominates how a product gets judged in someone’s hands. Shoppers decide with their fingertips. Their brains just write the caption afterward.
Where This Actually Plays Out
Picture a classroom in soft, breathable uniforms. Kids fidget less and focus more, because nothing scratchy is competing for their attention. Picture a hospital bed dressed in gentle linens instead of stiff, clinical ones. Shoulders drop a little faster. Picture a five-star hotel robe with real weight to it, sheets with a thread count you can feel before anyone announces the number. The room has already made its case before a single staff member says a word.
None of that happens by accident. It happens because someone understood that texture does emotional work whether a brand plans for it or not.
A World Woven in Texture
Travel far enough and texture starts speaking in dialects. Silk carries centuries of ceremony in Japan. Kente cloth, hand-woven in raised patterns across West Africa, tells stories of heritage and status that a photo alone can’t capture. Dense wool in Scandinavia is less a style choice than a survival strategy that eventually became culture, resilience spun into every fiber to get through a brutal winter.
These aren’t just materials. They’re identities, worn on the body and handed down.
The Blind Spot Nobody’s Solved Yet
E-commerce cracked color, cracked fit charts, mostly cracked video. It has not cracked touch. Researchers testing simulated haptic feedback in online apparel shopping found that screens still can’t replicate the confidence a customer gets from actually handling a fabric. Until touchscreens catch up, the only honest way to sell texture online is to describe it relentlessly: fiber content, weight, weave, finish, and photography that doesn’t oversell the hand-feel it can’t actually deliver.
The Unglamorous Part Nobody Photographs
Here’s the part that never makes the mood board: none of the feelings above survive an inconsistent production line. A designer can imagine the perfect hand-feel for a fabric, but if the machinery behind it drifts from batch to batch, that feeling never reaches the person wearing it.
That’s the role Svegea of Sweden plays, and it’s a deliberately unglamorous one. We don’t design the emotional experience of a textile; the manufacturers do that. What precision engineering does is make sure the texture a designer imagined is the texture that actually ships, consistently, so mills can spend their energy on the parts that require imagination instead of fighting variance on the floor.
The Actual Point
Stop designing only for how a fabric photographs. Start designing for how it will feel against skin, in the middle of an ordinary Tuesday, when nobody’s paying attention and the fabric is doing its job anyway. Texture is already telling a story. The only real choice is whether you’re the one writing it.
To talk through what consistent, imagination-ready production could look like for your line, reach out to Håkan Steene directly at h.steene@svegea.se, or visit www.svegea.se.
TL;DR
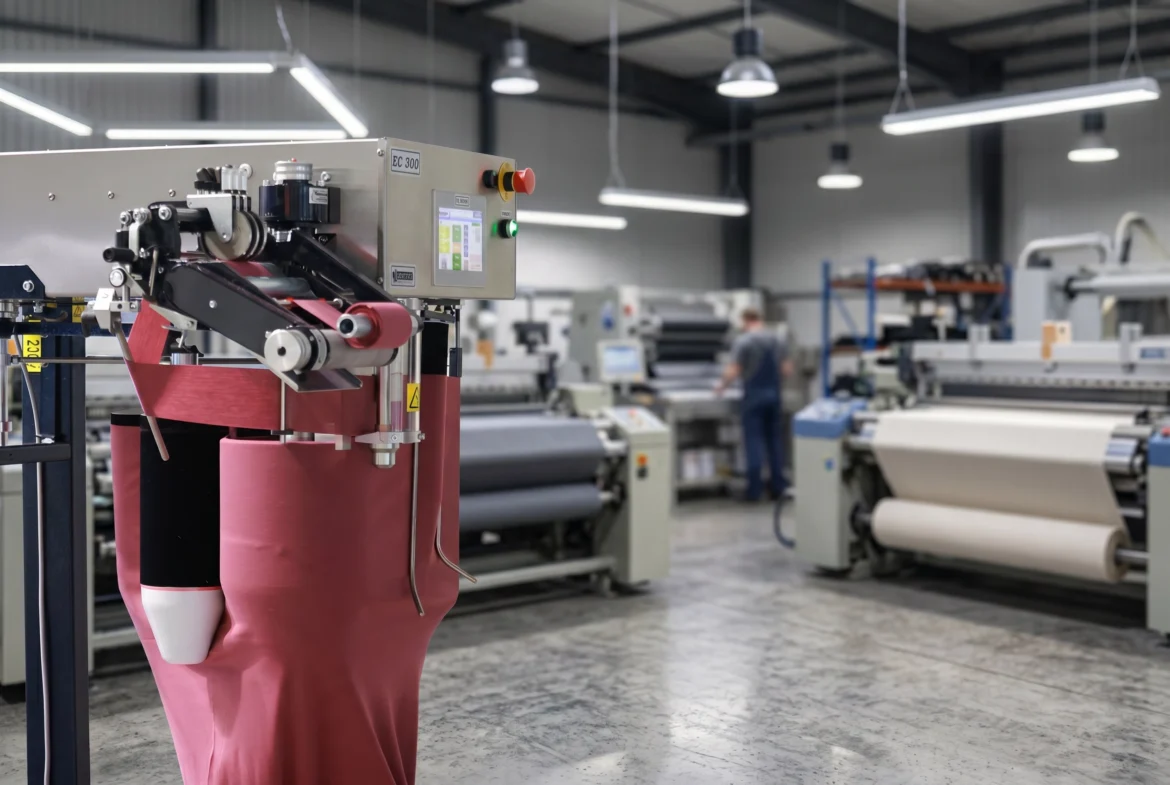
Single jersey and other technical knits curl and stretch the moment a blade touches them — it’s built into how the fabric is constructed, not a sign something’s broken. The real fix isn’t a slower line or a more attentive operator. It’s tensionless, synchronized feeding that lets the fabric arrive at the blade already relaxed, so the cut reflects the fabric’s true dimensions instead of a stretched, temporary one.
Every cutting room operator working with knits has seen it: the fabric looks fine going into the machine, then the cut edge curls, ripples, or comes out narrower than it should. It’s tempting to blame the operator, the blade, or the line speed. Usually, none of those are the real problem.
Curling Isn’t a Defect. It’s Physics.
Single jersey — the most common weft knit used in T-shirts, base layers, and casualwear — is built from loops, not interlaced threads like a woven fabric. The front face and back face of the loop structure sit under different tension. That imbalance is exactly what makes the fabric curl at a cut or unfinished edge. It’s a documented structural outcome of how the loops are formed, not a flaw in a specific roll of material.
Add tension during cutting, and the problem compounds. Research into how woven and knitted fabrics behave under bias and shear stress shows that fabric under load deforms elastically before it’s even cut. Meaning the shape you’re cutting isn’t the shape the fabric wants to hold once tension releases.
Cut it stretched, and it snaps back distorted the second it relaxes. For rib knits and technical tubular constructions, that snap-back doesn’t just cost a few millimeters of width — it throws off every downstream measurement that depends on that edge being accurate.
Where the Distortion Actually Comes From
Most knit distortion during cutting traces back to one of three points in the process:
- Manual tracking adjustments. An operator nudging the fabric to compensate for drift introduces exactly the kind of uneven pull that causes curling and skewed edges.
- Start-up jerk. The first few seconds of a run — before speed stabilizes — is when fabric gets yanked hardest, and it’s often where the worst distortion shows up.
- Unsupported tension zones. Any point where the fabric isn’t actively guided or supported is a point where it can twist, especially on tubular knits that want to roll along their own axis.
None of these are operator failures. They’re the predictable result of feeding elastic material through a system that isn’t built to account for how elastic material actually behaves.
Fabric under manual tension → cut applied → tension releases → edge curls / narrows / skewsWhat Tensionless, Synchronized Feeding Actually Fixes
The fix isn’t better technique. It’s removing tension from the equation before the blade ever touches the fabric.
Synchronized feeding locks the speed of the fabric source to the speed of the cutting head, ensuring the material moves through the system without pulling or holding back at any point. When you achieve precise synchronization, the fabric reaches the blade in a relaxed state—meaning the blade cuts the fabric’s true, unstressed dimensions. The material never snaps back after you make the cut, because the feed system never stretched it in the first place.
This system delivers the biggest impact on the exact materials that cause the most headaches on a conventional line: single jersey, rib knits, and tubular technical knits, where the fabric’s very construction bakes in tension differences between layers or directions.
Where the Euro-Collarette Series Fits
We built the Euro-Collarette Series specifically around this problem.
Its electronic soft-start eliminates the initial jerk at the beginning of a run. By bringing the fabric up to cutting speed gradually rather than abruptly, the system prevents distortion right where it usually starts.
We designed the band and fabric guides specifically for technical tubular knits. They support and align the material through the cut, stopping it from twisting or rolling on its own. Pair this layout with variable cutting speeds that adapt to different knit constructions. The machine easily balances the structural differences between a tricky single jersey and a heavy rib knit instead of running everything at a single speed.
You get an edge that holds its true dimension run after run. No operator manual adjustments required.
Why This Matters Before the Sewing Line Ever Sees the Fabric
A distorted edge doesn’t announce itself at the cutting table.
It shows up two or three stations later. A panel that measured perfectly on the cutting log suddenly refuses to align with its counterpart at the sewing machine. By then, the true cost skyrockets far beyond the price of the fabric itself. You’re paying for the labor to catch the defect, pull the ruined panel, and recut a replacement from fresh stock.
Fix the edge early. Getting it right at the cutting stage remains the cheapest place in the entire production chain to solve this problem. Everywhere downstream, that same fix costs more.
See the Euro-Collarette Series in Action
It steals your line speed. It drives up rework and triggers constant assembly rejects. If edge distortion on technical knits is costing your factory time and money, you need to change your process. See how synchronized feeding and precision band guiding handle your fabric differently.
Visit the Euro-Collarette Series page for full specifications. Or reach out to Håkan Steene at h.steene@svegea.se to talk through your specific fabric and production setup.
TL;DR
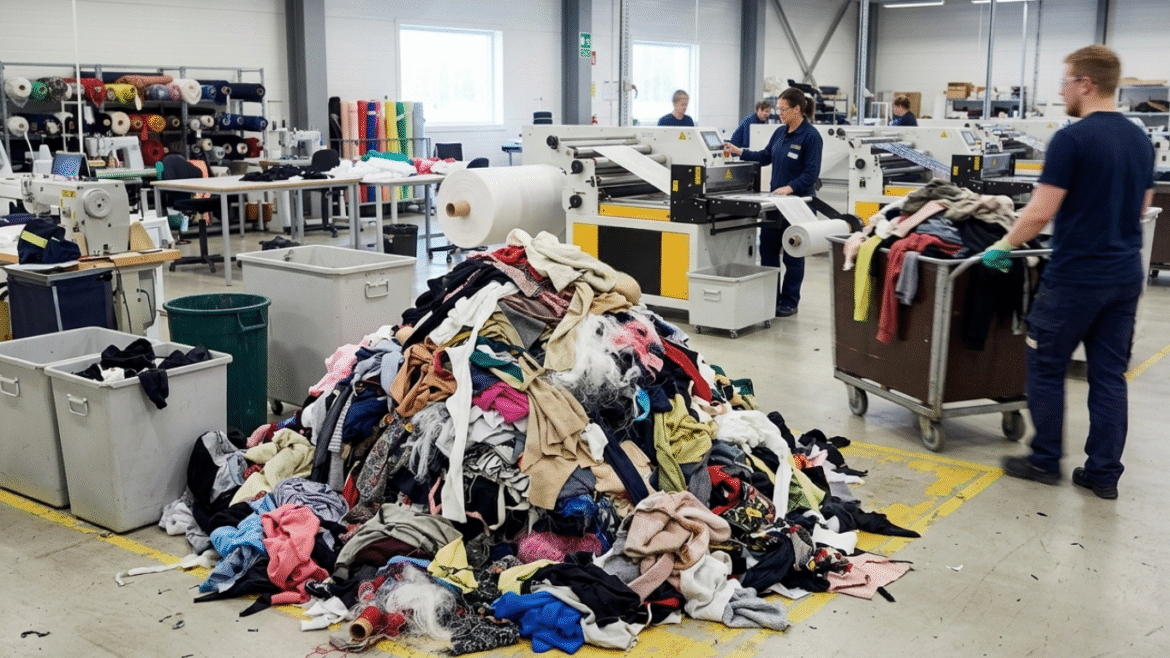
Cutting rooms routinely lose 10-15% of raw material to scrap, and some estimates run even higher. Active material optimization tackles this head-on. Synchronized feeding, precision fabric cutting, and tight tension control let facilities keep more of the fabric they pay for. The payoff isn’t just a smaller waste pile — it’s fewer downstream rejects and a healthier margin on every roll.
Material costs eat up more than half the total production budget in apparel manufacturing. Yet the cutting room — the single biggest opportunity to control that cost — is still where factories lose the most. Manual layouts, inconsistent tension, and operator guesswork have turned scrap into something everyone accepts.
That tolerance is getting harder to justify. Researchers tracking cut-and-sew waste across the apparel supply chain put the number at roughly 10-15% of fabric discarded before it ever becomes a garment. This figure traces back to sustainability researcher Timo Rissanen and has held up across more recent industry reviews. A separate fact sheet on clothing and textile waste puts a similar figure on how much delivered fabric ends up on the cutting room floor (resource.stopwaste.org/fact-sheet/clothing-and-textiles). Multiply either number across a full production run, and the math stops being a rounding error.
Active material optimization is how factories claw that margin back. It pairs automated material handling with precision cutting technology so scrap gets designed out of the process instead of cleaned up after the fact.
What Fabric Scrap Actually Costs You
Every offcut and rejected panel costs a factory twice. First, you’ve already paid for material that never becomes a finished garment. Second, someone still has to handle and dispose of it — that’s labor and disposal fees on top of the wasted fabric itself.
The bigger issue is what bad cutting does further down the line. When tension drifts during cutting, panels warp slightly — not enough to catch in a quick inspection, but enough to pull unevenly once stitched. That mismatch shows up at the sewing stage as a reject, and now you’re paying to recut from fresh stock and eating the labor twice.
What “Active” Optimization Actually Means
Most cutting rooms run reactively: feed the roll in, let the operator adjust for wrinkles or tension shifts as they show up. Active material optimization flips that. Instead of reacting to problems after they appear, automated systems monitor and stabilize the material continuously through the cut.
Getting there means controlling three things at once:
- Mechanical alignment — keeping material square (or precisely on the bias) relative to the blade
- Tension control — preventing the stretch or compression that rollers introduce as fabric moves through the line
- Dimensional consistency — the same component width from the first meter of a roll to the last
Nail these three, and you can tighten margins between components, compress nesting layouts, and cut wide-trim waste dramatically.
Synchronized Feeding: Where Tension Control Actually Happens
Knitted and elastic fabrics are the hardest to get right. They stretch under the slightest pull, and if a blade cuts fabric while it’s under tension, the material snaps back to its relaxed shape the moment it’s released — and that snap-back is where dimensional errors come from.
Fabric under tension → cut applied → fabric relaxes → dimensional inaccuracy / scrap
Synchronized feeding solves this by locking the speed of the fabric source — a turntable, a roll support — to the speed of the cutting head itself. Svegea’s True-Drive II system, for example, uses electronic synchronization to remove physical pull on the material entirely, so fabric reaches the blade already relaxed. Cut on true dimensions instead of stretched ones, and the downstream warping that ruins components simply doesn’t happen.
Precision Fabric Cutting, By Machine Design
High-yield cutting machinery is the most direct lever a factory has for pulling waste out of the cutting room. It replaces manual guesswork with mechanical consistency.
The Svegea CMS 1800A2 Strip Cutter is a good example of what that looks like in practice — a PLC-controlled knife carriage paired with an integrated dust grinding unit, holding tight tolerances across a working width of up to 1650 mm. That consistency is what lets a machine extract more usable product from every roll, run after run.
The Svegea Euro-Collarette Series solves a related but different problem: guiding technical tubular knits, single jersey, and rib fabrics through variable cutting speeds without distortion. Its electronic soft-start eliminates the jerking motion that typically wastes fabric in the first few seconds of a run — a small detail, but one that adds up over hundreds of production cycles.
Traditional workflow:  manual feed → tension shifts → inconsistent widths → high scrap rate
Optimized workflow:    synchronized feed → controlled tension → precision cut → minimal waste margin
Waste Reduction Has to Live in the Workflow, Not Just the Machine
New equipment only gets you halfway. The other half is how the floor actually operates day to day, especially when dimensions change between orders.
In a lot of factories, changing cut dimensions still means stopping the line, manually adjusting blades, and running test cuts until the new size checks out — burning both time and fabric in the process. Flexible cutting systems with tool-free width adjustment and precise mechanical scales cut that changeover down to minutes, and the first cut of a new run comes out usable instead of scrap. That matters most for smaller, custom orders, where setup waste can otherwise eat the whole job’s margin.
Keeping It Working: A Few Habits Worth Building In
Optimization isn’t a one-time upgrade — it holds up better with a bit of ongoing discipline:
- Run a waste audit. Track scrap weight per shift against total fabric used to find where losses actually concentrate.
- Trace downstream rejects back to their source. When a sewn component gets rejected for distortion, follow it back to the original cutting or tension issue.
- Calibrate on a schedule. Blades and synchronization sensors drift over long runs — a routine maintenance schedule catches that before it shows up as scrap.
None of this is glamorous work, but it’s the difference between a cutting room that quietly bleeds margin and one that doesn’t.
Optimize Your Textile Cutting Efficiency
Curious how precision Swedish engineering could tighten up your cutting room, stabilize material tension, and cut fabric waste? For technical guidance, machinery specs, or a conversation about your production layout, reach out to Håkan Steene at h.steene@svegea.se or visit svegea.se.